Sunday 20 November 2011

Cuban Black Beans

Cuban Black Beans Ingredients:


2 1/2 cups black beans, dried
9 cups water

1 1/2 cups onion, chopped

1 1/2 cups green bell pepper, chopped

3 cloves garlic

1 teaspoon salt

1/2 teaspoon black peppercorns

2 tablespoons olive oil for sautéing

1 teaspoon oregano

1 teaspoon cumin, ground

1 bay leaf

3 tablepoons vinegar

3/4 cup dry Spanish wine

2 teaspoons sugar

2 tablespoons olive oil (to drizzle over beans in final step)


Cover dry beans with water and let stand covered overnight. Drain and discard water.
Place the cleaned black beans in a large 6-quart saucepan. Add water and olive oil – this will prevent the beans from foaming. Bring the beans to a boil, reduce heat to low, cover, and cook until the beans are tender, about 1 hour.

Whichever method you use, do not drain the water from the cooked beans.
Meanwhile, chop onion and green pepper. Mash the garlic with salt and peppercorns in a mortar and pestle.
Sauté the onions and green pepper in olive oil until the onions are translucent. Add mashed garlic and sauté another minute or so.
Add the cooked beans, oregano, cumin, bay leaf, vinegar, and wine. Cover and simmer over low heat for 15 to 20 minutes, stirring occasionally. Remove bay leaf.

Add additional salt and pepper to taste.
Stir in the sugar; then drizzle a couple of tablespoons of olive oil over the beans. Immediately cover the pot, remove from heat, and let stand for 10 minutes.
Serve the by now fantastically prepared black beans over white rice.
You may garnish the beans with cilantro and chopped white onions. Not only do they look good presented this way, they taste even better than they look.


Thanksgiving Roasted Carrots

Ingredients:

4 bunches of organic Dutch carrots
Ground cinnamon
Cinnamon sugar
Garlic salt
Cumin
Extra virgin olive oil spray
Foil
First take your carrots and clip off the tips and stems...wash the carrots and place them on a foil covered oven sheet.  Spray extra virgin olive oil over the foil and carrots.  Sprinkle the ground cinnamon, cinnamon sugar, garlic salt, cumin and spray a bit more olive oil over the top of the carrots.  Place them in the oven at 200 degrees Celsius (400 degrees Fahrenheit) for about 25 minutes. They are ready when you see the carrots glazing over.

Challah Bread

A really good friend of ours who is Jewish decided to contribute to the celebrations by bringing a typical bread that is eaten on Shabbat. That is the best part of  thanksgiving is can be celebrated by any religion and by anyone. Through the years in the United States with the multitude of immigrants Thanksgiving diners include an array of non traditional American dishes. Everyone for the majority celebrates Thanksgiving as a national holiday, each family adds a tradition from their home land. Like Miami where you wouldn't have Thanksgiving with out the staple black beans and rice... or my mother's lasagne.
Challah bread taste delicious and I will be making some for Christmas. 
Kids loved it because it a sweet bread!!!
photo taken from http://thebakersguide.com/challah-bread

Ingredients:

1 ½ cups of raisins (plumped) 
1 ¾ cups of warm water
2 tablespoons of dry yeast
1/3 of a cup of sugar
1/3 of a cup of light honey
3 ½ tablespoons of salt
½ of a cup of oil
3 eggs
2 egg yolks
6-8 cups bread flour


Egg Wash Ingredients:
2 tablespoons of water
2 tablespoons of sugar
1 egg
1 yolk

In a large mixing bowl, stir together the yeast and water.  Let stand for 5 minutes to allow the yeast to swell and dissolve (you should notice a difference. Briskly stir in the sugar, honey and salt.  Add oil, eggs, yolks and about 5 cups of flour...stir into a shaggy mess and let stand 10-20 minutes to absorb the flour. 
Knead by hand or with a dough hook, then add the remaining flour as much as it requires to be soft and elastic, and no longer sticks (the bowl should be clean if doing with a dough hook.) 
If adding raisins let the dough rest for 10 minutes on a lightly floured board and then press the raisins in as evenly as possible, and knead the dough over to tuck them in.  Place the dough in a greased bowl and cover with a damp towel...let it rise in a draft free place until it double in size (45-90 minutes.)

Now punch it down and let it rise again until it doubles again (45-90 minutes.)

Divide the dough in two and braid each half into its own challah.  Spray the sheet pan (you can use two pans, one for each.  Brush the egg wash on, and let it rise until it puffs (20-30 minutes.)
photo taken from http://thebakersguide.com/challah-bread


Preheat the oven to 200 degrees Celsius (400 degrees Fahrenheit) and bake the bread for 12 minutes. Then reduce heat to 180 degrees Celsius (350 degrees Fahrenheit) and place it back in he oven for another 25 minutes or until the bread is browned (if you want to keep it light put tin foil over the top for the last 20 minutes.)

Turkey Gravy

Ingredients:

1 cup of turkey drippings (the juice that drips from the cooked turkey)
1 can of gravy mix (store bought upon preference)
1 cup of chicken stock
1/2 a cup of butter


Heat the turkey drippings in a pot and when warm pour in the gravy mix. Once the mixture is thickening pour in the chicken stock and the butter.  Stir until the consistence is thickened but not creamy.

If you wish not to use the gravy mix- from the store..

Just add flour slowly to the drip pins, and a bit of Worcestershire Sauce or Red Wine...
The trick is to mix the flour in slowly until you reach the desired consistency..

No photo sorry of my own gravy I think I deleted it by accident.

Thursday 17 November 2011

Cornbread

Ingredients:


2/3 cup of butter or margarine (softened)
1 cup of sugar
3 eggs
1 2/3 cups of plain flour
1 cup of cornmeal or polenta
4 1/2 teaspoons of baking powder
1 teaspoon of salt

In a bowl mix the softened butter and sugar...in another bowl combine the eggs and milk.  Then mix the flour, cornmeal or polenta, baking powder and salt in the food processor while adding the butter/sugar mixture and the egg mixture alternately until even.  Pour the mixture into a greased baking pan and bake at 200 degrees Celsius (400 degrees Fahrenheit) for about 20-25 minutes.  To check if it's ready, stick a toothpick in the center and if it comes out clean it's done.  I like to cut mine into cubes and serve warm.

Roasted- Parsnip Bread Pudding

This recipe is from www.marthastewart.com
I have followed it word for word and it was very successful...the only alterations I made was to add more salt & pepper than the original recipe asked for.
This is the link to the webpage for the recipe I used. http://www.marthastewart.com/335713/roasted-parsnip-bread-pudding

I have a motto “ When in doubt Martha Knows best.”

Ingredients:
450 grams of parsnips (peeled and cut into 1.2 centimeter pieces)
Extra virgin olive oil (for drizzling
Coarse salt
Freshly ground pepper
1 ounce (2 tablespoons) of unsalted butter, plus 1 1/2 ounces (3 tablespoons), melted butter (plus more
for the dish)
2 large leeks, white and pale-green parts only (halved lengthwise, thinly sliced, and rinsed well...about 3
cups)
1/3 of a cup of dry white wine
2 tablespoons of chopped fresh thyme
2 cups of heavy cream
5 large eggs
1 cup of finely grated Parmesan cheese
1 loaf (340 grams) of brioche (crust removed and bread cut into 2.5 centimeter cubes)

Preheat oven to 220 degrees Celsius (425 degrees Fahrenheit.) Drizzle parsnips with oil, and season with
salt & pepper. Arrange on a rimmed baking sheet. Roast, shaking occasionally, until caramelized and
tender, 23 to 25 minutes. Let cool. Reduce heat to 190 degrees Celsius (375 degrees Fahrenheit.)


Heat 2 tablespoons of butter over medium heat in a medium saute pan until melted. Add leeks, and cook,
stirring occasionally, until tender, about 5 minutes. Remove from heat; add wine, and return to heat. Let
simmer until reduced, 1 minute. Add thyme, and remove from heat. Stir in roasted parsnips.

Whisk together melted butter, heavy cream, eggs, and 3/4 cup of Parmesan in a large bowl. Season with
salt & pepper. Add leek-parsnip mixture, then fold in bread. (Mixture can be refrigerated overnight.)

Butter a shallow 2-quart baking dish, and pour parsnip mixture into dish. Cover loosely with parchment,
then foil, and bake until golden brown and puffed, 50 minutes. Remove parchment and foil. Sprinkle
with remaining cup of Parmesan, and return to oven. (I sprinkled more salt & pepper.)

Bake for 10 more minutes. Let stand for 5 minutes before serving.
Martha’s Note:
To make this savory pudding ahead of time, assemble and refrigerate it for up to one day. Let stand at room temperature for 10 to 15 minutes, and bake as instructed.


This is my Roasted- Parsnip Bread Pudding so if yours looks like mine and not the one that is carefully edited for a photo shoot in Martha Stewart's website, you still have done a great job and it will taste perfect!!! ( I should have taken it out of the over a couple minutes before but I had to many things happening in then kitchen at once..so remember to keep an eye on it while its cooking;)

White Truffle Oil Mac & Cheese

Ingredients:

Kosher salt
Vegetable oil
1/2 kilogram of elbow macaroni
1 quart of milk
8 tablespoons of unsalted butter (cut into cubes)
1/2 a cup of plain flour
340 grams of grated Gruyere cheese
226 grams of grated extra-sharp Cheddar cheese
1/2 a teaspoon of freshly ground black pepper
1/2 a teaspoon of nutmeg
1 1/2 cups of panko bread crumbs
White truffle oil

First preheat the oven to 190 degrees Celsius (375 degrees Fahrenheit)...in a large pot of boiling salted water drizzle some vegetable oil and add the pasta...cook the pasta for about 8 minutes or to what your directions read.

In the meantime heat the milk in a pot until warm, but not boiling...in another large pot melt 6 tablespoons of unsalted butter and then add the flour...cook over low heat and whisk while adding the warm milk, for about 2 minutes or until it thickens and smoothes.  Take the pot off of the heat and add the Gruyere, Cheddar, salt, pepper, nutmeg and macaroni's...stir evenly.  Place the mixture in a casserole dish and drizzle white truffle oil sparingly (to taste) over the top.  Melt the left over 2 tablespoons of butter and combine it with the panko bread crumbs...then sprinkle them evenly over the top of the macaroni and bake for 30-35 minutes or until the top of the bread crumbs are browned.

( I would like to apologise for the bad photos..Cooking, serving guest and everything else got in the way of good photography)

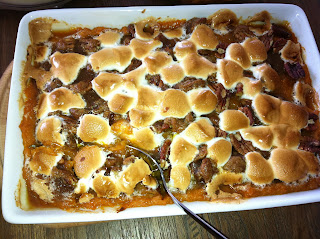
Sweet Potatoes Pecan and Marshmallow Casserole

This recipe is one of the most traditional American Thanksgiving recipes…I will warn you this is not one for the hips but it sure is tasty… 


Ingredients:

4 cups of mashed sweet potatoes (this is about 1 kilograms of raw sweet potatoes)
1 cup of brown sugar
2 eggs (lightly beaten)
1 teaspoon of vanilla
½ cup of whole milk
½ cup of melted unsalted butter 


Ingredients for the topping:

½ cup of brown sugar
1/3 cup of flour
1/3 cup of melted butter
1 cup of chopped pecans and some whole
10 large white marshmallows, cut into 4’s  (or half a cup of the mini marshmallows)

Boil the sweet potatoes until soft, drain and mash. Combine the sweet potatoes with brown sugar, 2 eggs, vanilla, milk and unsalted butter...mix it all together evenly.

I let it sit in the fridge for about 30 minutes or even overnight so that the flavors set but also because I like to prep the day before.

In a casserole (greased lightly with butter) that is no more than 5 centimeters deep spread the sweet potatoes evenly.

Then mix all the remaining ingredients (except for the marshmallows)...
Mix: flour, brown sugar, butter and pecans.  Then sprinkle the mix of nuts on top of the mashed sweet potatoes. Add the cut marshmallows or the ½ a cup of mini white ones over...you don’t have to cover the whole pan just add the marshmallows here and there.
Bake at 180 degrees Celsius (350 degrees Fahrenheit) for 30 minutes until hot and the marshmallows have browned.


Homemade Pumpkin Pie and Pate Brisse Pie Crust

photo belongs to http://simplyrecipes.com/recipes/suzannes_old_fashioned_pumpkin_pie/


Pate Brisse Pie Crust Ingredients:


2 1/2 cups of plain flower
1 teaspoon of salt
1 teaspoon of sugar
1 cup of unsalted butter (chilled and cubed)
1/2 cup of iced water


Combine the flour, salt, sugar and butter into a food processor and mix.  While the food processor is running, slowly add ice water until the dough holds together without being wet or sticky (about 30 seconds)...to test if your dough is ready, squeeze a small amount of the dough together and if it crumbles just add some more ice water (a tablespoon at a time.)  Once it is ready divide the dough into two equal balls, flatten each ball into a disc, wrap in plastic and chill in the refrigerator for an hour.


Pumpkin Pie Ingredients:


1 pumpkin (about .6 kilograms) 
1 cup of brown sugar
1 tablespoon of corn flour
1/2 teaspoon of salt
1 teaspoon of ground ginger
1 teaspoon of ground cinnamon
1/4 teaspoon of ground cloves
1/8 teaspoon of cardamon
4 large eggs
1 1/2 cups of evaporated milk
1 tablespoon of heavy cream


Preheat the oven to 200 degrees Celsius (400 degrees Fahrenheit.)  With a sharp paring knife, cut several slits in the pumpkin (pierce the skin all the way through) to allow steam to escape.  Place the pumpkin in a baking dish, pour about an inch of water at the bottom and bake for about 1 1/2 hours, until the skin is easy to peel off.  Once the pumpkin is ready, cut off the top and scoop out the seeds...peel the skin and mash the pumpkin until it becomes a puree.  Once it has been pureed place it in a drainer for about 10 minutes to discard of the excess water.


Now raise the heat of the oven to 200 degrees Celsius (425 degrees Fahrenheit.)  In a food processor combine the sugar, corn flour, salt, ground ginger, ground cinnamon, ground cloves, cardamon, pumpkin puree, 3 eggs and evaporated milk...mix until even.


Between two pieces of plastic wrap, roll the pate brisee into a 30 centimeter circle. Fit pastry into a 22 centimeter glass pie plate. Trim the dough evenly along the edge, leaving about a 1 centimeter overhang...pinch to form a decorative edge. If the dough begins to soften, chill for 15 minutes. To make the glaze just beat the remaining egg, and combine with heavy cream. Brush the glaze very lightly on the edges of pie shell. 


Fill the pie shell with the pumpkin mixture. Bake for 10 minutes at 200 degrees Celsius (425 degrees Fahrenheit) then reduce heat to 180 degrees Celsius (350 degrees Fahrenheit) and continue baking for 30 minutes more. Now just let it cool on a wire rack.
Your pie should look like the above..I will be honest this was my first time making it. So ill look into perfecting the look of the pie. The taste was perfect and I couldn't have served a better tasting Pumpkin Pie. 

THANKSGIVING

I’m really enjoying this blog and I would like to thank all the people who follow it because you have all really inspired me to keep going and I would like to thank my family for always being hungry. All of you have made me more conscious of my goals in setting up this blog, and in a way I hope to entertain you. I have lots of (I hope) funny stories, anecdotes, etc. to come.


When I said I passed on the traditions of my family on to my new family what I meant is I try my best at instilling the values that are important to me, and of course those which are important to my husband. What a blessing having a family is!!! 
I also like to think that in teaching good morals, sound judgment with an incentive to use common sense and what children believe is true to their hearts; parenting is always a challenge. I truly believe that food and the dinner table are a blessing. We are blessed by God (or whatever you believe in) when you can sit across a loved one and share food. From the beginning of time eating together has always been a peaceful event and one to give thanks for. I don’t like many holidays and quite often I forget birthdays, but I will always treasure and celebrate Thanksgiving with the most joy.

Thanksgiving is an American holiday and besides Canada I do not think it is celebrated anywhere else. The holiday is in memory of the Pilgrims and the Native Americans sitting together at a table eating and giving thanks. (Many other political arguments can be drawn from the festivities but I would like to focus on the positives of it.)

For me Thanksgiving is a day when we celebrate the gift of having each other.  We give thanks to the Lord for even the small things we have; but most importantly it’s a day I like to give thanks for having a family, for being healthy and for being surrounded by people I love. It is also a day that I like to remember all our loved ones that are not here with us and thank them for watching over us.

My childhood and teenage years where spent mostly in the United States, Miami to be precise. So my Thanksgiving dinners had Cuban Latino influences. This is one of the things that made me realize how important family is. When I was growing up in the States being a small family of 3 (my mom, dad and I), it was hard to fill a house for an event like Thanksgiving. Our relatives respectively all lived in different countries; however my mom and my second grade teacher, Aidita, became very good friends and I remember all Thanksgiving's and many other festivities spent with Aidita's family. They had the warmth and love that big families have and they embraced us into theirs. I loved Thanksgiving at Aidita's and to this day consider her family my family. Through the years we have gone through loss, divorce and the birth of many new member of our families. We always gathered at Thanksgiving and gave thanks that we had each other and thanks for the love and commitment each person had to the other.  That is what family is about and all the same values remain, even when things go pear-shaped.

Aidita is of a Cuban family that exiled to Miami in the 1950’s, they have gone through it all. They know what it is like to flee a country in only what you have on, leave all your belongings and the ones you love behind and come to a country where you have to start over. When you surround yourself with people that have lost everything, but have had the faith and hope in themselves and their families and the love to keep them together, you are in the company of some really amazing people. I had the privilege of being a part of that family.

Hey, everyone knows no one parties like a Cuban…so when the praying and eating are done…we hit the dance floor with salsa and merengue music...laughter and joy of all fills the air and that is what Thanksgiving is to me…

 PRAY LOVE  EAT & PARTY

This Thanksgiving was my first in Australia and as I have been asked by the kids, "can we please, please have this every year"..I happily said "yes we will"…
It was with great joy that I cooked for our closest friends some new some old. A total of 60 guest!!!
I think everyone enjoyed the food, the atmosphere and the genuine ceremony of giving thanks. For many of my guests it was their first Thanksgiving.

So the Thanksgiving menu that I will slowly post is a collection of traditional Thanksgiving recipes along with other recipes that have there own and personalized twist. I would like to thank Martha Stewart for her amazing blog that has helped me fill some of the gaps and has added tremendous value to my dinner party.

I celebrated Thanksgiving a week early so that I could post before the big day and hopefully give you all time to cook these recipes for the actual day.

I had 60 people over at my house (between adults and children.)
I cooked a total of 3 Turkeys (2, 5 kilo ones, and one 7 kilo.)

I also served 14 other dishes that I made from scratch at home. Including the ultimate Thanksgiving Pumpkin Pie. 

The biggest challenge of Thanksgiving is the turkey...a good turkey is moist and therefore must be cooked slowly.  Allow up to 6-7 hours for a 5-7 Kilo turkey to cook at low heat.

I have made many Turkeys but this year for the 1st time I cooked mine on a BBQ (closed grill). I think from now on I will always cook my turkeys this way. However any oven big enough to fit a Turkey will still give you an amazing Turkey. So here are my Thanksgiving recipes..xx

Thursday 6 October 2011

Avocado Tuna Quick & Easy Pasta

This is one of my favourite quick and easy pastas to make. Quick because the ingredients are all raw, nothing needs to be cooked except the pasta and the result is delicious. This is the trick with pasta- it's a base for anything, so you can literally add anything to pasta. Remember though, the base to a good pasta, no matter what your sauce is, is that the pasta must be al dente. Don't overcook pasta, it is a sin to Italians, and it will not have the best flavour if you overcook it...also add salt to the water of the pasta, this is how the pasta takes on flavour...it doesn't matter how much flavour is in your sauce if you don't add salt to the water your pasta will still taste bland.

This recipe was born out of necessity, the way that most of my recipes are born...in college my roommate used to tell me to make a miracle meal...I used to ask "why miracle?"...she said "well we have nothing in the house and you still manage to make the best pasta" (I guess I'll give myself the credit for being resourceful)...so one time we were all hungry and literally all we had to work with was pasta, some vine tomatoes, shallots, Danish feta, tuna and parmiggiano (of course I'm italian so I always have parmiggiano)...
I literally made a pasta with what I had and it was delicious...I wouldn't normally add avocado to pasta, as in Italy no one would traditionally put that in...but I'm half Aussie now and in Australia they put avocado on everything, so I went for it...and guess what, it tastes great on pasta...

so here is what you need..

Ingredients:

200g of 'Barilla' fusilli

1 medium can of tuna (I like the chilli flavoured one)
1/2 an avocado
1 whole large vine tomato
1 shallot
1/2 a block of Danish feta - 50g (or to taste)
1 tablespoon of basil from 'Gourmet Garden' (also add fresh basil if you have any)
1 tablespoon of garlic from 'Gourmet Garden'
4 olives (I used Sicilian ones, they are green, that were pre-marinated in oil)
Parmiggiano (amount should be to your taste)
1 dash of garlic salt (small amount)
Olive oil
Pepper

Chop the tomatoes, shallots, avocado and olives. Add the can of tuna, I like the oil of the chilli one but if you don't then drain it; just make sure to add olive oil again because the tuna can make it dry. Then add the Danish feta, I like to crumble it with my hands.
Place all the remaining ingredients in a bowl, mix and taste. If you think it needs anything more go ahead and add to your liking...also feel free to remove any ingredient you don't like...

Boil the pasta...like I always say, and I'm not advertising here, but my 'Barilla' fusilli always does wonders for me; but please use any brand you like and check the cooking time on the box...you don't want mushy pasta...

Once the pasta is ready- drain it, mix in the ingredients, add a sprinkle of parmiggiano and serve...MANGIA!!!
(sorry for the messy pic, quick and easy isn't always the neatest)

Hope you enjoy...

One last thing I wanted to say is that the scope of my blog is not to be a culinary pioneer but on the other hand, to remind other homemakers and mom's that it doesn't have to take long to make something yummy and healthy...nor do we have to look further than what is already in our refrigerators...and yes for those who are confused about pasta, it is healthy unless you eat 4 servings. For good measure know that a serving of pasta shouldn't be more than 100g, that is what I serve my big man...for myself I serve 60g to 80g...most of the calories are hidden in the sauce...

Please, if you come up with a quick and easy pasta recipies share it with me, I'll be more than happy to post it...
XXXX

Wednesday 5 October 2011

Cauliflower and Broccoli Ricotta Bake

Ingredients:

2 heads of cauliflower
2 heads of broccoli
Ricotta cheese
Finely minced garlic - either fresh or garlic paste from 'Gourmet Garden'
Basil - fresh or basil herb from 'Gourmet Garden'
Garlic salt
30 grams of tasty cheese or white cheddar/ parmiggiano
Bread crumbs
Pine  nuts
Pepper

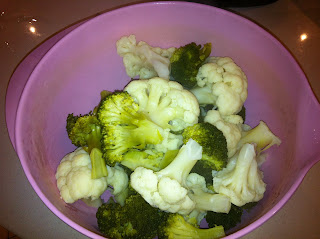
Boil the cauliflower and broccoli, adding salt to the water.

Mash the cauliflower and broccoli and get rid of any excess water.
In a bowl that is oven safe, mix the broccoli and the cauliflower and toss 1 tub of ricotta into the mix along with the garlic, garlic salt, basil herbs, etc., plus your tasty cheese or parmiggiano...make sure the top of the mixture is spread evenly...

On the top add a layer of grated tasty cheese or parmiggiano or both…sprinkle a little bit of the bread crumbs all over, evenly…also add some pine nuts (about a table spoon)…

Place it in the over for max 20 minutes at 180 degrees...when you notice the top to be a nice golden colour and your cheeses have all melted it is ready.


This has been the best way to get the children to eat the scary cauliflower. It is a nice side to steak and chicken and if you are a vegetarian it can be a full meal. I hope you like this recipe and please feel free to use the same concept and add other vegetables that you love...

Tuesday 27 September 2011

Swordfish Siciliana

In Sicily, my native land (I can say that even though I was born in Florida and I’m practically becoming an Aussie now…but that’s where my family roots are from and recently had my second wedding to my hubby...I have always been very proud of my Sicilian roots and the inevitable beauty and charm of the land and it’s people) one of the prides is their food; it’s serious business, as it is all over Italy. Sicily, being in the south is a bit lazier and laid back but is certainly firmer in keeping with old traditions. Shops close for lunch and everyone is home for lunch cooked by Mamma.  Maybe the Milanese opt for a quick bite near the office but the Sicilian’s, I am afraid, are not in the same rush to get back to work. We also have much better weather in the south; our land is rich in it’s people, the soil and it’s traditions. Living here in Sydney I come across many Sicilian people who are even from towns only a mile away from mine.
Sicily is the largest island in the Mediterranean, first settled by the Phoenicians and Saracens, we date our history back to Greek Mythology and in ancient times we were the bread basket of civilization.  We were also the last to come out of feudalism and of course Hollywood made us famous or infamous for the Godfather. Sicily is famous for it’s blood oranges, cassata Siciliana, arancini, tuna, cannoli and thousands of other dishes. In fact, this summer I was lucky to take the whole family to an original Sicilian restaurant few would ever come across, with original recipes that date back hundreds of years. If you are ever booking a trip to Italy and would like to visit the magical island of Sicily please do, you will only come back from your trip delighted. Oh, and if you rent a car there might be a little frustration; as my hubby would say they drive like crazy, and yes they do. I will tell you this, Taormina is a must, Catania, Palermo and Syracuse are beautiful, as well as the western coast of Trapani…if you are a boat lover you must go to the Eolie Islands right off the eastern coast of Sicily. The island of Vulcano has beautiful mud baths and just a hop away is Panarea, where you can party all night or Lipari, which is just the most beautiful of them all.

Now back to my recipe, I have decided to call it Swordfish Siciliana…
You will find many dishes in Sicily to be made with pinenuts, raisins, anchovies, etc.
This recipe, again, is a piece of cake and not messy at all...I don’t like cooking messy things if you haven't noticed. Go to your local fish market or fish shop and ask for a thick slice of Swordfish...some people think that swordfish meat is tough, but it is only true if you grill it and if the slice of fish is too thin.

Ingredients:

1 piece of swordfish per person
Pinenuts - handful
Raisins – handful
Olive oil
1 anchovy
4 capers 
1 glass of white wine
2 garlic cloves – coarsely chopped
Shallots
1 large vine tomato
Fennel herb – freshly chopped
Parsley – freshly chopped
‘Chefs Recipe Organic Sicilian Style Seafood Seasoning’ - I like using it because it has a nice blend of all the spices I need (garlic, basil, fennel seed, red pepper, lemon myrtle, black whole pepper and Himalayan Pink Salt)

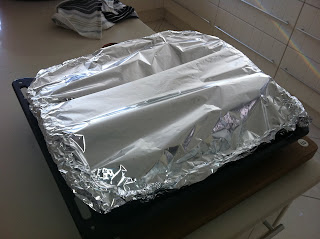
First turn the oven on and pre-heat it to 180 degrees Celsius…in an oven safe tray lay some foil, then place the swordfish pieces and drizzle a bit of olive oil over them. Place the chopped tomatoes, pine nuts, raisins, parsley, shallots, the anchovy cut up, capers (washes and desalted) and garlic over the swordfish. Sprinkle an abundant amount of your ‘Sicilian Seafood Seasoning’, pour the white wine over and close the foil.

Place it in the over for 15 minutes and it’s ready (swordfish cooked this way will remain moist and not have that tough consistency.) If you feel that it has not cooked enough take a bite off one piece, close the foil back up again and put it back in the oven for another 5 minutes.

I like to serve this dish with less traditional Sicilian sides, so I made corn on the cob and baked potatoes. My baked potatoes are truly an American influence.

I wash the potatoes and wrap them in foil, leaving the skin on. I make a cross on them with a knife before I close the foil to allow the heat in. They take about 30 minutes, so it is the first thing I do.

Then when they are ready I add sour cream, small chopped bacon bits and shallots…

Here is our full meal before it got eaten… so sorry for the sloppy photo; I had to be quick before it was devoured…

Tuesday 13 September 2011

MINI BUN-LESS VEAL BURGERS

This recipe is one of my favorites and it’s not just limited to veal, you can use any meat mince ( beef, pork, ostrich, chicken.) This is a dish high in protein, great for everyone and especially if like me you are training for a race. I have been very attentive lately to not eating too many carbs and keeping my protein intake higher so I can feed my muscles, this way I will be strong for the 9km challenge. I accompany the mini bun-less burgers with string beans, and lots of them. 


I like to make my own burgers and spice them up my own way as opposed to buying pre spiced mince that can be filled with preservatives. Feel free to use the concept of this recipe and adjust it to the flavours you like in a burger.  I keep the size of them relatively small so that I can have more mini burgers on my dish with the same amount of meat I would use for one patty. The key is no bread!!!

Minced veal - 500 g
1 egg
1 ½ Chunky garlic paste from ‘Gourmet Garden’ - about half a tablespoon
1 ½ tbsp. Moroccan herb & spice blend from ‘Gourmet Garden’ - about half a tablespoon (add more for stronger flavor)
Mixed seeds - 1/3 of a cup of sunflower, chia, sesame seeds, etc. (I use a brand called ‘KAPAI PUKU’, the seed of life, I buy it at the organic food store)
Cumin
Garlic salt
Olive oil - 1½ tablespoon
Raisins - hand full
Pecorino cheese - 30grams
Salt & pepper
Parsley – freshly chopped
Coriander – freshly chopped

* You may add anything else you like in the mince mix, if you would like to add shallots or onions go ahead it’s all a matter of taste. Maybe you have some left over vegetables you grilled the night before…if so, cut them small and work them into the mixture.  The cheese is also optional, if you would like to keep it a bit leaner you don’t have to put it in. The main thing is having a good seed mix that is high in protein…it will also make the mini burgers crunchy. One of the best flavorings for my burgers are the genius products from ‘Gourmet Garden’, they make my life so easy…I just squeeze the fresh herbs in and I’m ready to go. I have spoken with the company and they assured me that no MSG or other harsh preservatives are used in making them; and that is why they have to be refrigerated and have an expiration date. However some of their products in the range have gluten, but it is specified in the back so please check the packaging. I must admit that I’m very happy using them and they save me a lot of time in the kitchen whilst making my food tasty. They also have a Thai seasoning that is divine…
So put the mince, egg, olive oil and the rest of the above ingredients in to the bowl and mix…get in there with your hands to make sure the mince and the ingredients are blended well together…

Now make even meatballs and lay them on a sheet of foil, spray some olive oil on the foil beforehand so that they don’t stick …
Put them in the over at 200 degrees for 15 minutes…I try one just in case they are a bit raw in the middle and go from there…it’s then ready to serve…
I always like to serve some greens on the side so for this dish I made simple green beans.

Ingredients:

Green beans – 200 g
Olive oil
Salt & pepper
Lemon

Cut the ends off the green beans and boil them for 10 minutes in water without salt, make sure you don't over boil them or you will loose all the nutrients.
Drain and serve. Now dress them with extra virgin olive oil  and lemon, add salt & pepper….Yummy and quick!
What may seem like burned little pieces of cardboard on my plate are actually really tasty onions I quickly cooked in a pan. I need to get a new camera ...My poor iPhone camera is not doing my food justice!!!


Here is a picture of the cooking process. They are just onions, a little olive oil salt and pepper...
XXX


Monday 12 September 2011

QUICK & EASY TUNA PASTA

It’s lunch time, I have a million things to do and my hubby says "I’m hungry, but I don't have much time because I have to run to my next meeting…."

"OKAY" I say, "just sit tight I’ll make you the best pasta….AMORE MIO!!!"

This is the quickest pasta ever...you don’t have to cook anything, just boil the pasta…

I of course always have a house stocked with enough ‘Barilla’ pasta of every kind to feed an ARMY.
I like penne or fusilli for this recipe...
Either one is fine; they both cook for max 11 minutes…don’t use long pasta because it will get messy…

First, always put the pasta to boil in salted water because it takes 11 minutes to cook, and with this recipe it will only take you 5 minutes to make the sauce.

You need a can of tuna, here in Australia I’m completely obsessed with ‘Serena Tuna’ because they have lovely cans that come with chilly oil or lemon pepper...the best!!!

Ingredients:

Pasta - 150 g of either penne or fusilli ('Barilla' is my preference)
1 can of ‘Serena Tuna’ in chili oil – you can also use regular tuna in oil and add chili flakes
Parmiggiano cheese - 30g
Olive oil
1 tbsp Chunky garlic paste from ‘Gourmet Garden’
1 tbsp Basil herb mix from ‘Gourmet Garden’
1 tbsp Mediterranean seasoning from ‘Gourmet Garden’


please feel free to add more or less of each depending on your taste!!!

*See the website for were you can find their products in your area:


 In a bowl mix the tuna with all the oil from the can, in my case I keep the oil because it is chili oil. If you have regular tuna in water or don’t want the oil from the can then just add extra virgine olive oil (once the can has been drained), Parmiggiano cheese and all of the herbs (either fresh ones or the herbs from the 'Gourmet Garden'...either way is fine)...now just mix everything evenly. 

This is just how I made it for this occasion but feel free to add anything you like…maybe you have some sundried tomatoes, artichokes (in olive oil or canned) or olives in your refrigerator then add them in. The idea of this recipe is to make a quick and easy pasta with what you have at home, so get creative!!!!

When the pasta is ready and AL DENTE… drain the pasta, add it to the tuna mixture and drizzle in some olive oil at the end to really blend everything nicely… add some fresh basil and your are done (I didn’t in my picture as I was really in a rush!!!)

NOW IT IS READY TO EAT

A WELL FED HUSBAND = HAPPY HUSBAND!!!!

Thursday 8 September 2011

Prosciutto e Melone - Rockmelon and Prosciutto Appetizer

This is a great combo because the rockmelon and the prosciutto complement each other (salty and sweet.)

I bought Australian made prosciutto, which was a lot cheaper than the Italian one…the difference is that the Italian one was probably less salty than the Aussie, but I didn’t think it was enough to justify the difference in price. I do not recommend using the Spanish prosciutto because it is cured differently and has a different consistency.

Ingredients:

1 rockmelon
1/2 kilo of prosciutto (Australian or Italian)

First slice ¾ of a rockmelon into long strips and remove the skin. Then cut the slices in half because it can be overwhelming to eat a whole piece at a time.

Once you have all of your rockmelon ready and your thinly sliced prosciutto laid out, you roll the prosciutto onto the rock melon and voila, your done!


Easy and delicious!!!

Sunday 4 September 2011

Skinny BBQ RIBS

I went to the butchers the other day to stock up on meats...I haven’t always been a huge meat eater but living with an Aussie there is only so much pasta and veggies he will eat, so the days I indulge in meat I make memorable. My favourite is BBQ ribs, a good old American tradition. There are many ways, and certainly elaborate ones, to cook them...mine is by no means elaborate and does not involve a BBQ grill or any mess for that matter...

When I was single and living alone one of my all time favourite hangouts was Barnes & Nobles, a bookstore in the US with good coffee and great books you can read all day without having to buy any…Well one day I was cruising the aisles and a particular book cover caught my attention...the book is called Skinny Bitch by Rory Freedman and Kim Barnouin… I didn’t know what it was about but I thought, ohhh diet book, I want to be a Skinny Bitch too… I already had a massive collection of these genre of books that included: the South Beach Diet, Eat Right for Your Type, Atkins Diet, etc. etc....I have found them all useful but to be taken with a grain of salt. I ended up discovering that the only diet or lifestyle that will keep you thin is to eat everything in small quantities and MOVE…

So, I take the Skinny Bitch home only to find out in the first chapter that this book is about veganism. It’s a well written book, which I read in a day, hypnotized by the stories and “truths” about the meat industry, the slaughter houses, etc. Most importantly it mentioned that if I wanted to be a Skinny Bitch I had to completely eliminate all dairy, meat and who knows what else from my diet. After a day of reading I professed myself a VEGAN (what a strong word)… So for 6 months I ate bird food, tofu, veggies and even got conned into not drinking coffee (I don’t know why but I did.)  I then started to gain weight, which is when I should have picked up Eat Right for Your Blood Type (being an O+ it is highly recommended that I eat meat)…this was all too stressful, I couldn’t eat out, I started looking pale, I was not skinny but on the contrary I had put on 5 pounds.  All in all I was miserable….
One night I had a dream, the kind that makes you sweat at night. In this dream I was eating BBQ ribs, I could smell and taste them (oh it was divine)...I woke up thirsty, angry, confused and still dreaming of those ribs.  I drove to Tony Roma's, the house of ribs (it's a restaurant chain in the US)… sat by myself (I didn’t think I needed any company) just me, my baby back ribs, coleslaw and a baked potato… I finished off a half slab of the most tender, perfectly marinated ribs (the meat just fell off the bone)… oh it was so good! The staff was looking at me funny, but I didn't care, I licked my fingers and washed it all down with a glass of iced tea…LA BELLA VITA….
Expect wait...full stop…ouch ouch…massive stomach cramps kicked in. You can imagine my tummy had only been digesting beans, sprouts, tofu and veggies for six months...this was a fair effort if you ask me…so the shock of the ribs had me lying down on the booth for 30 minutes cramping and then went home to the have a double dose of Alka-Seltzer. It was worth it though, and never again have I gone down any extreme food path like that.

I love my meat and love animals, but if I trace my genes back to the caveman I was a hunter and not a gatherer. I like wearing leather so I feel that I cannot feel bad for eating meat and then go around wearing nice leather shoes and handbags…I now have a lovely friendship with ribs and all meat. My stomach is now accustomed to eating everything in moderation, and I’m far happier. It was a painful lesson I learned that day, but I can say with sincerity, especially to the kids, that yes we can eat everything, even if it’s junk food, but in moderation…
Enough of my babbling…let’s cook up some RIBS…

Ingredients for the BBQ ribs:

3 racks of pork ribs
Hoisin sauce
Foil

I buy a slab per every two people …and for my big guy; he is special, so he gets an entire one for himself…

The ones you are seeing in the photos of my recipe have been pre-marinated, from the butcher, with soy and honey…I place them in the sheet pan and rebase them with hoisin sauce…I love the flavor.
If your butcher has ribs that are not marinated the marinade is easy…

You can either use traditional BBQ sauce or you can marinate them in hoisin sauce, soy sauce and honey...there are thousands of tasty marinades on the market…However beware, most of the marinaded have preservatives (some marinades will contain hidden MSG sources) that may not suit everyone so check the packaging and read carefully in case any of your family members or guest have specific dietary needs.

I lay the ribs in foil, add the hoisin sauce and seal them in foil…by cooking them this way you keep the moisture and heat in so that they do not burn or become dry. Cook them at 200 degrees Celsius…I cooked 3 full racks for 35 minutes…the last 5 minutes I took the foil off the top and lowered the heat so they would brown even more…this keeps them tender and the meat will just fall off the bone (don’t worry if the juices on the foil become burnt.)

As a side, I will stick to my Skinny Bitch theory since ribs are not the most waist-friendly meal. I therefore accompanied them with brown rice and a nice vegetable stir fry.

BROWN RICE 

I use very little oil in my stir-fry, and to keep the veggies from burning I add a bit of water…I keep the flavours simple since the BBQ ribs already have a strong flavour… I make a stir-fry with whatever I have at home (so any veggies you have will do.)

Ingredients for the veggie stir-fry:

1 large white onion
1 carrot
2 bunches of asparagus
1 knob of ginger (sliced)
1/2 a head of red cabbage
4 mushrooms
Salt & pepper

(Please feel free to add or remove any veggies and create your own stir-fry)


Cut up all of the vegetables. Cook the onions, ginger and carrots first, when the onions are soft and the smell of the ginger is more intense add the red cabbage…once you see the cabbage begin to soften add the asparagus and finally the mushrooms…I think that in order to have an even consistency with vegetables you have to know what will take longer to cook and what will release more moisture into the stir-fry…now just add salt & pepper.

I also make a plain green salad: rocket and spinach mix, shallots and dress it with olive oil, fresh lemon and salt & pepper…this way I don’t eat too much rice.


So now we can sit down and eat my ‘Skinny BBQ RIBS’!

Please note that this post and its contents are not meant to offend vegans or any non-meat eating groups or individuals. I firmly believe that in life we have to choose the lifestyle that best suits us, and therefore eat what we believe is best for ourselves and our families. I learnt a lot from Skinny Bitch and to this day have altered some of my diet due to the issues raised in this book.  xx SARA